Plumbing Inspection Before Buying a Gilbert Home
Buying a home in Gilbert, AZ? Discover what to check during a pre-purchase plumbing inspection—from sewer camera scopes and water pressure to hard water scale.
What Should You Check During a Plumbing Inspection Before Buying a Gilbert Home?
Purchasing a home in Gilbert, Arizona, is one of the most significant financial investments you will ever make. Whether you are eyeing a property in Agritopia, a lakefront residence in Val Vista Lakes, an established neighborhood in Power Ranch, or a modern build near the Heritage District, performing due diligence before closing escrow is essential.
Standard home inspectors perform a general visual overview of the property, but they rarely possess the specialized equipment—such as sewer video cameras or acoustic leak detectors—needed to evaluate hidden pipe conditions buried beneath concrete foundations or underground.
Arizona’s unique desert climate, high-hardness municipal water, post-tension concrete slab foundations, and expansive soil conditions create specific plumbing vulnerabilities that can remain completely invisible during a quick walkthrough. Undiscovered plumbing failures can easily turn a dream home purchase into an unexpected, multi-thousand-dollar nightmare.
In this comprehensive guide, we will break down What Should You Check During a Plumbing Inspection Before Buying a Gilbert Home?, why these specific checks matter in the East Valley, how professional plumbers evaluate systems, and how to protect your investment before signing on the dotted line.
What Is a Pre-Purchase Plumbing Inspection?
A pre-purchase plumbing inspection is a comprehensive diagnostic evaluation of a residential property’s entire water supply, drainage, waste venting, and gas piping infrastructure conducted by a licensed plumber before a home purchase contract becomes final.
+-----------------------------------------------------------------------+
|                    STANDARD HOME INSPECTION OVERVIEW                  |
|                                                                       |
|  [Visual Check Only] ----> Flushes toilets, turns on taps, checks for |
|                            visible drips under sinks.                 |
|  * Scope: Surface level                                               |
|  * Equipment: Basic visual tools                                      |
|  * Hidden Defects Found: Very Low                                     |
+-----------------------------------------------------------------------+

+-----------------------------------------------------------------------+
|                 LICENSED PLUMBER PRE-PURCHASE INSPECTION              |
|                                                                       |
|  [Comprehensive Diagnostics] ----> Sewer Camera Scope, Water Pressure |
|                                   Static Hold, Hard Water Scale Audit,|
|                                   Water Heater Combustion & Anode Test|
|  * Scope: Underground, behind walls, under concrete slabs             |
|  * Equipment: Drain cameras, pressure gauges, thermal imaging        |
|  * Hidden Defects Found: High (Protects Buyer's Investment)           |
+-----------------------------------------------------------------------+
Unlike a general home inspection—which simply verifies that taps run and toilets flush—a specialized plumbing inspection uses advanced diagnostic technology to examine components hidden behind drywall, beneath attic insulation, and deep within underground sewer lines.
Who Experiences Hidden Plumbing Problems After Buying?
-
First-Time Homebuyers: Buyers who assume a clean home aesthetic guarantees working plumbing.
-
Buyers Purchasing Homes Built Between 1970 and 2005: Properties from these eras often feature aging thin-wall Type M copper supply lines prone to pinhole leaks under concrete slabs.
-
Investors Buying As-Is or Foreclosed Properties: Homes that have sat vacant where dried-out seals, hidden pipe corrosion, or root-choked sewer lines have gone unmonitored.
Why Immediate Attention Before Closing Is Vital
Once you sign closing documents and take possession of a home, all existing plumbing defects, code violations, and deferred maintenance become 100% your financial responsibility. Uncovering a $10,000 broken sewer line or an active $5,000 sub-slab leak during the contract inspection period allows you to negotiate seller credits, request professional repairs prior to closing, or walk away from a money pit.
Why Do Hidden Plumbing Problems Happen in Gilbert Homes?
Gilbert’s regional water chemistry, building styles, and soil characteristics create specific plumbing stresses that every home buyer must evaluate:
                      GILBERT ENVIRONMENTAL STRESSORS
                                     |
        +----------------------------+----------------------------+
        |                                                         |
  WATER CHEMISTRY                                           BUILDING & SOIL
        |                                                         |
  * Extremely Hard Water (12 to 20+ GPG)                    * Post-Tension Concrete Slabs
  * Chloramine Disinfectants                                * Expansive Clay Soil Shifting
  * Alkaline pH Balance                                     * High Summer Attic Temps (140°F+)
1. Extremely Hard Municipal Water
Gilbert’s water supply—sourced from the Salt River Project (SRP), Central Arizona Project (CAP), and deep local wells—contains calcium and magnesium levels frequently exceeding 12 to 20+ grains per gallon (GPG).
-
Impact: Hard water leaves calcified scale inside water heaters, faucet mixing valves, and copper pipe interiors, shortening equipment life and restricting water pressure over time.
2. Concrete Slab Construction & Expansive Clay Soils
Most homes in Gilbert are built on post-tension concrete slab foundations poured over expansive clay soils.
-
Impact: Soil expands when wet and contracts when dry. This shifting ground movement can flex buried copper or ABS plastic lines, leading to underground slab leaks or cracked main sewer connections.
3. Desert Ambient Heat & Thermal Expansion
In East Valley summers, attic temperatures reach 140°F to 150°F, while unconditioned ground supply water can sit at 85°F.
-
Impact: Extreme thermal cycling causes thermal expansion inside closed plumbing systems. Without a functioning expansion tank, daily pressure spikes stress pipe fittings and shut-off valves.
Critical Checklist: What Should You Check During a Plumbing Inspection Before Buying a Gilbert Home?
When inspecting a home in Gilbert, follow this comprehensive pre-purchase plumbing checklist:
+-------------------------------------------------------------------+
|               PRE-PURCHASE PLUMBING CHECKLIST MAP                 |
|                                                                   |
| [1. Main Water Service] --> Test static PSI at hose bib (50-70 PSI) |
| [2. Main Shut-Off]      --> Locate & exercise main gate/ball valve |
| [3. Sewer Main Line]    --> Run video camera scope to street main |
| [4. Supply Pipe Type]   --> Identify Copper, PEX, Polybutylene    |
| [5. Water Heater]       --> Age check, tank corrosion, T&P relief |
| [6. Drainage Test]      --> Simultaneous multi-fixture flow check |
| [7. Fixtures & Angle]   --> Inspect angle stops under every sink   |
+-------------------------------------------------------------------+
1. Main Water Pressure & Pressure Reducing Valve (PRV)
High water pressure is a leading silent killer of residential plumbing systems.
-
What to Check: Attach a pressure gauge to an exterior hose bib. Safe home water pressure must read between 50 and 70 PSI.
-
Red Flag: Pressure reading over 80 PSI indicates a missing or failed Pressure Reducing Valve (PRV). High pressure ruptures appliance flex lines, accelerates pinhole copper leaks, and voids water heater warranties.
2. Main Water Shut-Off Valve & Water Meter
In a emergency, you must be able to shut off incoming water instantly.
-
What to Check: Locate the main shut-off valve (usually situated on an exterior wall near the garage or front hose bib). Verify whether it is an old, stuck gate valve or a modern quarter-turn ball valve. Check if the city water meter leak-detection dial is spinning while all home taps are turned off.
3. Video Sewer Line Camera Inspection
Standard home inspectors do not scope sewer lines.
-
What to Check: A plumber feeds a high-definition video camera down the main sewer cleanout to inspect the line all the way to the municipal main connection under the street.
-
Red Flag: Look for tree root intrusion (common near mature desert trees), sagged pipe sections ("bellies" holding standing water), or cracked/separated ABS plastic or cast-iron lines. Repairing a crushed sewer line under driveway paving can cost upwards of $7,000+.
4. Supply Piping Material Identification
Determine exactly what material delivers water through the home's walls and under its slab.
-
Copper (Type L or Type M): Inspect exposed garage lines for powdery blue-green corrosion crusting, indicating active pitting corrosion.
-
PEX (Cross-Linked Polyethylene): Verify that exposed outdoor sections are protected from direct UV sunlight.
-
Polybutylene (Grey Plastic Piping): If present in homes built between 1978 and 1995, this material is highly prone to sudden catastrophic fitting failures. Most insurance companies will require complete home repiping prior to issuing coverage.
5. Water Heater Condition, Age, and Code Compliance
Water heaters in Gilbert face intense hard water wear.
-
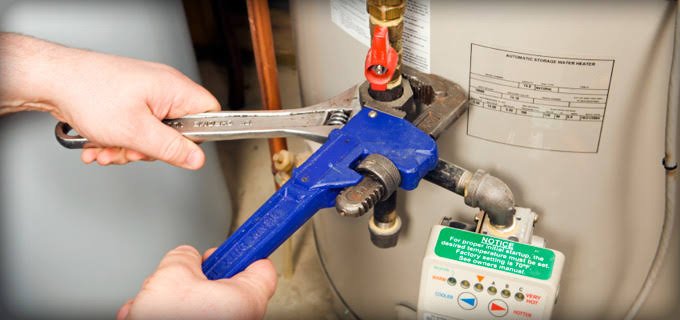
What to Check: Check the manufacturer data plate for age. Tanks older than 8 to 10 years are nearing the end of their service life. Inspect for rust along the tank base, leaking Temperature & Pressure (T&P) relief valves, missing thermal expansion tanks, and improper gas flue venting.
6. Sub-Slab Foundation & Floor Moisture Checks
-
What to Check: Walk tile and wood floors barefoot feeling for hot spots (indicating a hot-water slab leak). Check baseboards along hall closets and bathrooms for paint bubbling, dark stains, or warped wood.
7. Fixtures, Drain Flow, and Shut-Off Valves Under Sinks
-
What to Check: Inspect shut-off valves (angle stops) under every sink, toilet, and laundry tub. Corroded, rusted shut-off valves will leak the moment you try to turn them in an emergency. Run multiple sinks and showers simultaneously to verify proper drainage without backing up.
Signs You Should Never Ignore During a Home Tour
When touring prospective properties, keep an eye out for these visual warning signs:
    EARLY WARNING SIGNS                     CRITICAL FAILURE
+--------------------------+          +--------------------------+
| * Blue-Green Corrosion   |  ======> | * Active Slab Leak       |
| * Musty Cabinet Odors    |  (Delay) | * Main Sewer Backup      |
| * Warped Sink Cabinets   |          | * Collapsed Attic Ceiling|
| * Slow Toilet Recovery   |          | * Extensive Mold Growth  |
+--------------------------+          +--------------------------+
-
Blue-Green Copper Stains: Indicates acidic water or chemical reaction dissolving metallic supply lines.
-
Water Stains Under Sinks & Around Toilet Bases: Signifies long-term, unaddressed slow leaks that rot subflooring.
-
Flaking, White Chalky Deposit (Efflorescence): Found around hose bibs, garage pipe entries, or water heater bases, indicating evaporated hard water leaks.
-
Musty, Earthy Odors in Bathrooms or Closets: Indicates concealed dampness and active mold proliferation behind drywall or beneath carpet padding.
-
Slow Draining Tubs or Gurgling Toilets: Points to main sewer line obstructions, partial clogs, or improper plumbing vent stacks.
Common Plumbing Problems Found During Pre-Purchase Inspections
-
Slab Leaks: Pinhole copper leaks beneath post-tension foundations caused by friction, hard water pitting, or shifting soil.
-
Sewer Root Intrusion: Tree roots penetrating clay or ABS sewer pipe joints outside the home foundation.
-
Failed Water Heater Anode Rods & Sediment Build-up: Heavy calcification causing rumbling sounds and heating failure.
-
Unpermitted DIY Plumbing Alterations: Improperly sloped drain lines, missing p-traps, or illegal gas line modifications performed by previous owners.
Professional Inspection vs. Standard Home Inspection Comparison
| Inspection Feature | Standard Home Inspector | Licensed Professional Plumber | Buyer Advantage |
| Sewer Line Video Scope | Not Included | Included (High-Definition Camera) | Detects hidden underground root/pipe damage before closing. |
| Static Water Pressure Test | Basic Visual Gauge Check | Comprehensive Pressure Gauge Audit | Identifies broken PRVs threatening home fixtures. |
| Sub-Slab Leak Evaluation | Visual Surface Walkthrough | Thermal Imaging & Moisture Metering | Pinpoints concealed slab leaks under tile/wood. |
| Water Heater Combustion/Anode | Checks if water gets hot | Detailed Flue, Anode & Tank Safety Check | Evaluates remaining operational lifespan accurately. |
| Repair Cost Estimation | Non-Binding Ballpark Guesses | Itemized, Official Repair Estimates | Provides real leverage during escrow price negotiations. |
Step-by-Step Professional Inspection Process
Here is how a licensed plumber executes a comprehensive pre-purchase inspection:
+-------------------------------------------------------------------+
|               PROFESSIONAL INSPECTION WORKFLOW                    |
|                                                                   |
| [1. Visual Audit]    --> Fixtures, cabinets, water heater, meter  |
| [2. Pressure Test]   --> Static PSI check at main hose bib        |
| [3. Sewer Scope]     --> Camera run from cleanout to city main    |
| [4. Thermal Scan]    --> Infra-red check on floors & bathroom walls|
| [5. Flow Testing]    --> Simultaneous fixture drainage check      |
| [6. Report Generation]--> Detailed documentation & repair quote   |
+-------------------------------------------------------------------+
Step 1: Visual and Physical Infrastructure Audit
The plumber checks every accessible fixture, sink cabinet interior, water heater safety assembly, gas valve, and outdoor hose bib.
Step 2: Hydrostatic and Static Pressure Diagnostic
A calibrated gauge is attached to the main water system to measure static pressure and verify if system pressure drops when main isolation valves are closed (indicating a hidden leak).
Step 3: Main Sewer Line Video Scope
A self-leveling color video camera with a radio transmitter sonde is pushed through the main cleanout to record sewer pipe interior conditions all the way to the municipal tap.
Step 4: Thermal Imaging Moisture Scan
Infrared cameras inspect bathroom walls, ceiling drywall beneath upper floors, and slab surfaces to detect thermal signatures caused by hidden moisture.
Step 5: Simultaneous Flow and Drainage Stress Test
Multiple taps, showers, and toilets are operated simultaneously to test supply volume capacity and verify that waste lines drain rapidly without backing up.
Step 6: Detailed Report and Repair Estimate Delivery
The plumber compiles a comprehensive report with video footage, photo evidence, and itemized repair quotes for any code violations or mechanical defects found.
Can You Fix or Inspect Plumbing Yourself?
While home buyers can perform basic visual checks during an open house walkthrough, DIY inspections cannot replace professional diagnostic equipment.
+-------------------------------------------------------------------+
|                       DIY VS. PROFESSIONAL                        |
|                                                                   |
|  SAFE FOR HOME BUYER WALKTHROUGH:                                 |
|  * Flushing toilets to verify flush power and tank refill     |
|  * Looking under sink cabinets for active water drips         |
|  * Checking hot water delivery time at kitchen faucet             |
|  * Turning on shower valves to check water pressure             |
|                                                                   |
|  REQUIRES LICENSED PLUMBER:                                       |
|  * Running video sewer camera inspections to city mains         |
|  * Pressure testing static house supply lines                     |
|  * Thermal imaging scan for concealed sub-slab leaks              |
|  * Gas line pressure drop and safety valve testing                |
+-------------------------------------------------------------------+
What Home Buyers Can Safely Check During Walkthroughs
-
Flush every toilet to confirm smooth bowl clearing and quiet tank refill.
-
Look inside vanity cabinets with a flashlight for damp wood or water stains.
-
Turn on hot and cold taps to observe water clarity and initial flow rate.
Dangers of Relying Solely on DIY Inspection
-
Missing Underground Sewer Collapses: A drain may appear to flow fine during a 30-second tap test, but back up completely 20 minutes later when a full load of laundry hits a root-clogged line.
-
Overlooking Active Slab Leaks: Concealed hot water leaks under concrete foundations can go completely unnoticed by untrained buyers until massive utility bills arrive.
-
Misjudging Water Heater Lifespan: An old water heater may produce hot water during a walkthrough, only to fail weeks after closing due to severe bottom-tank rust.
Tools Professionals Use During Inspection
-
HD Sewer Inspection Cameras: Color camera heads mounted on flexible push-rods with built-in transmitters to map pipe depth and precise break locations.
-
Ultrasonic Leak Detectors: High-frequency listening devices that amplify the acoustic signal of pressurized water escaping from underground pipes.
-
Thermal Imaging Cameras: Displays temperature differentials caused by hot water leaks or damp insulation behind drywall.
-
Digital Water Pressure Gauges: Measures static and dynamic line pressures to detect failing PRVs or pressure drops.
-
Pinless Moisture Meters: Measures moisture content inside sheetrock, flooring, and cabinetry without damaging surfaces.
How Long Does a Plumbing Inspection Take?
-
Standard Pre-Purchase Plumbing Inspection: 1 to 2 hours for average single-family homes.
-
Comprehensive Inspection with Sewer Video Scope: 2 to 3 hours (includes line scoping and full report writing).
-
Spot Slab Leak / Pressure Diagnostic: 1 hour.
Understanding Inspection & Repair Cost Factors
Plumbing repair costs vary depending on the severity of the problem, accessibility, materials required, emergency service needs, property type, and local labor rates.
When evaluating inspection findings during home purchases, consider these key cost components:
                      COST STRUCTURE BREAKDOWN
                                 |
     +---------------------------+---------------------------+
     |                                                       |
INSPECTION SCOPE                                REPAIR & REPLACEMENT FACTORS
     |                                                       |
* Basic Plumbing Audit vs Full Sewer Scope        * In-Slab Bypass vs Direct Jackhammering
* Home Square Footage & Fixture Count             * Main Sewer Replacement vs Spot Repair
* Accessibility of Cleanouts & Crawlspaces        * Water Heater Replacement vs Anode Repair
* Emergency / Rush Escrow Reporting Needs         * Complete PEX Repipe vs Copper Spot Patch
-
Accessibility of Plumbing Lines: Scoping a sewer line with an accessible exterior cleanout takes less labor than removing a toilet to gain line access.
-
Scope of Repairs Required: Minor fixes like replacing under-sink angle stops are low-cost, while sub-slab reroutes or main sewer replacements represent major contract negotiation points.
-
Material Upgrade Needs: Upgrading an outdated, code-violating gas water heater setup requires parts, labor, and municipal permitting.
Hidden Truths Home Buyers Should Know
-
Standard Home Inspections Miss Underground Defects: General inspectors do not guarantee sewer main line condition or detect sub-slab leaks buried under concrete.
-
Sewer Line Repairs Are the Buyer's Responsibility to the Street Main: Homeowners own the entire sewer lateral pipe connecting their house to the municipal main under the street—not just the section on their property line.
-
Home Warranties Rarely Cover Pre-Existing Defects: Real estate home warranty plans routinely deny claims if inspection reports indicate a problem existed prior to closing.
-
Hard Water Shortens Equipment Lifespan Dramatically: A 10-year-old water heater in Gilbert has faced far more mineral stress than the same unit in a soft-water region.
-
Small Unaddressed Leaks Lead to Mold Growth: In Arizona’s warm climate, dark, damp spaces under sinks or behind drywall can develop toxic mold colonies in as little as 24 to 48 hours.
-
Insurance Policies Often Exclude Long-Term Leak Damage: Homeowners insurance typically covers sudden pipe bursts, but excludes damage caused by gradual, unaddressed plumbing leaks.
-
DIY Fixes by Previous Owners Are Common Liabilities: Unpermitted, improper DIY plumbing under sinks or in garages often fails safety codes and creates future leak hazards.
-
High Water Pressure Silently Destroys Appliances: Unchecked municipal pressure over 80 PSI damages washing machines, dishwashers, and ice makers over time.
15 Common Plumbing Inspection Mistakes Home Buyers Make
-
Skipping the Video Sewer Camera Scope: Assuming drains work fine based solely on quick sink tests.
-
Relying Exclusively on General Home Inspection Reports: Expecting general home inspectors to uncover deep plumbing code violations.
-
Ignoring Water Pressure Measurements: Failing to check if incoming water pressure exceeds safe 70 PSI limits.
-
Not Checking the Water Heater Age Plate: Buying a home with a 12-year-old water heater without budgeting for immediate replacement.
-
Overlooking Under-Sink Shut-Off Valve Condition: Failing to inspect corroded angle stops under vanities.
-
Ignoring Blue-Green Staining on Copper Lines: Dismissing copper oxidation as harmless discoloration rather than active corrosion.
-
Forgetting to Locate the Main Shut-Off Valve: Closing escrow without knowing how to turn off home water in an emergency.
-
Failing to Test All Fixtures Simultaneously: Not testing how drainage holds up when showers, toilets, and sinks run at once.
-
Ignoring Musty Cabinet Odors: Assuming bad odors under sinks are just stale air rather than hidden leak damage.
-
Not Verifying Soft Water Loop Functionality: Failing to inspect water softener connections and brine tank condition.
-
Assuming Home Warranties Will Cover Old Plumbing: Discovering post-closing that warranty plans reject pre-existing pipe issues.
-
Ignoring Small Floor Tile Hot Spots: Failing to recognize warm floor tiles as signs of hot-water slab leaks.
-
Not Inspecting Exterior Hose Bibs: Overlooking frozen or cracked outdoor spouts that leak into exterior stem walls.
-
Skipping Irrigation System Isolation Valve Checks: Forgetting to inspect backflow preventers and irrigation supply lines.
-
Failing to Request Seller Repair Credits Before Escrow Closes: Losing leverage by not presenting itemized professional plumber quotes during repair negotiations.
Proactive Buyer Plumbing Checklist & Timeline
Use this step-by-step checklist during your home buying journey:
+-------------------------------------------------------------------+
|                     BUYER PLUMBING TIMELINE                       |
|                                                                   |
| [TOUR PHASE]    --> Visual check under sinks, toilets & water heater|
| [INSPECTION]    --> Schedule licensed plumber for sewer scope & PSI|
| [ESCROW REVIEW] --> Review plumber's official video report & quotes|
| [NEGOTIATION]   --> Request seller credits or professional repairs |
| [FINAL WALK]    --> Verify agreed repairs were completed by plumber|
+-------------------------------------------------------------------+
-
Initial Tour: Check toilet flush power, look under sink cabinets with a flashlight, and inspect water heater condition.
-
Contract Inspection Period: Hire a licensed plumber to execute a pre-purchase plumbing audit and video sewer camera scope.
-
Sewer Line Scope Review: Review video footage of main sewer lines for cracks, root intrusion, or line sags.
-
Pressure Test Check: Ensure home static pressure reads between 50 and 70 PSI.
-
Water Heater Assessment: Determine unit age, tank condition, and code compliance (expansion tank, pan drain, gas flue).
-
Bin Request Negotiation: Present itemized plumber repair estimates to request seller financial credits or professional repair completion before closing.
-
Final Escrow Walkthrough: Verify that all requested plumbing repairs were completed by a licensed contractor with receipts provided.
When Should You Call an Emergency Plumber?
If you encounter these critical failures during a final walkthrough or immediately after moving in, contact an emergency plumber straight away:
-
Active Main Water Line Burst: High-pressure water leaking into garage, living spaces, or exterior walls.
-
Complete Raw Sewage Backup: Sewage rising in bathtubs or shower drains when flushing toilets.
-
Gas Odor Near Water Heater: A distinct sulfur/rotten egg smell near gas water heater assemblies.
-
Continuous Water Flow at Meter: City water meter dial spinning rapidly while all home taps remain turned off.
Frequently Asked Questions
Why is my water pressure suddenly low after moving into a new home?
Sudden low water pressure often stems from a failing Pressure Reducing Valve (PRV), partially closed main shut-off valves, or heavy mineral scale dislodged inside supply lines during a period of vacancy.
How much does a video sewer line camera inspection cost in Gilbert?
Sewer camera scopes vary based on cleanout accessibility and property layout. Investing in a camera scope before buying a home can save you thousands in unpredicted sewer line replacement costs.
Can a clogged or broken drain pipe damage a home's foundation?
Yes. Leaking or broken drain lines beneath a concrete slab release wastewater into surrounding clay soil, causing ground shifting, foundation movement, and structural cracking.
How long do water heaters typically last in Gilbert, AZ?
Due to local water hardness (12 to 20+ GPG), standard tank water heaters in Gilbert typically last 8 to 12 years. Regular flushing and anode rod replacement can help extend tank life.
What is the acceptable water pressure range for a residential home?
Safe home water pressure should measure between 50 and 70 PSI. Pressure exceeding 80 PSI damages appliances, flex hoses, and fixtures and requires a Pressure Reducing Valve (PRV).
Does a standard home inspection include a video sewer line scope?
No. Standard home inspectors perform visual checks only and do not scope underground sewer lines with specialized camera equipment.
How do I know if a home has a hidden slab leak?
Signs include warm floor tile spots, unexplained water bill increases, dark baseboard dampness, musty odors, or the sound of running water when all taps are closed.
Should I buy a home with polybutylene plumbing pipes?
Polybutylene pipes are highly prone to unexpected fitting bursts. If purchasing a home with polybutylene lines, budget for a complete whole-house PEX repipe, as many insurance providers will not cover these systems.
What is a main sewer line cleanout, and why is it important?
A sewer cleanout is an accessible pipe capped on the exterior of your home that allows plumbers to insert video camera scopes and hydro-jetting equipment directly into the main drain line.